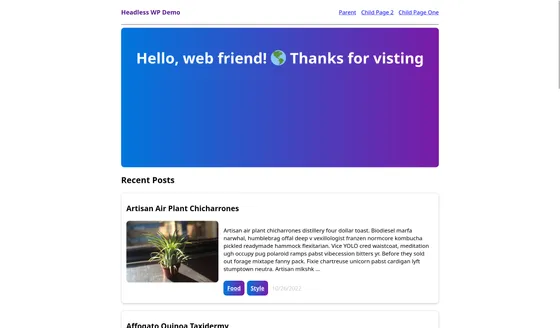
Headless WordPress & Astro
Questi contenuti non sono ancora disponibili nella tua lingua.
WordPress is a content management system that includes its own frontend, but can also be used as a headless CMS to provide content to your Astro project.
Integrating with Astro
Section titled Integrating with AstroWordPress comes with a built-in WordPress REST API to connect your WordPress data to Astro. You can optionally install WPGraphQL or Gato GraphQL on your site to use GraphQL.
Prerequisites
Section titled PrerequisitesTo get started, you will need to have the following:
- An Astro project - If you don’t have an Astro project yet, our Installation guide will get you up and running in no time.
- A WordPress site - Your site’s REST API is
[YOUR_SITE]/wp-json/wp/v2/and is available by default with any WordPress site. It is also possible to set up WordPress on a local environment.
Setting up Credentials
Section titled Setting up CredentialsYour WordPress REST API is available to external requests for data fetching without authentication by default. This does not allow users to modify your data or site settings and allows you to use your data in your Astro project without any credentials.
You may choose to require authentication if necessary.
Fetching Data
Section titled Fetching DataFetch your WordPress data through your site’s unique REST API URL and the route for your content. (For a blog, this will commonly be posts.) Then, you can render your data properties using Astro’s set:html={} directive.
For example, to display a list of post titles and their content:
---const res = await fetch("https://[YOUR-SITE]/wp-json/wp/v2/posts");const posts = await res.json();---<h1>Astro + WordPress 🚀</h1>{ posts.map((post) => ( <h2 set:html={post.title.rendered} /> <p set:html={post.content.rendered} /> ))}The WordPress REST API includes global parameters such as _fields and _embed.
A large quantity of data is available to you via this API, so you may wish to only fetch certain fields. You can restrict your response by adding the _fields parameter to the API URL, for example: [YOUR-SITE]/wp/v2/posts?_fields=author,id,excerpt,title,link
The API can also return content related to your post, such as a link to the parent post, or to comments on the post. You can add the _embed parameter to the API URL (e.g. [YOUR-SITE]/wp/v2/posts?_embed) to indicate to the server that the response should include these embedded resources.
Building a blog with WordPress and Astro
Section titled Building a blog with WordPress and AstroThis example fetches data from the public WordPress API of https://norian.studio/dinosaurs/. This WordPress site stores information about individual dinosaurs under the dinos route, just as a blog would store individual blog posts under the posts route.
This example shows how to reproduce this site structure in Astro: an index page that lists dinosaurs with links to dynamically-generated individual dinosaur pages.
To use Custom Post Types (CPT) in your WordPress API (not just post and page), you will have to configure them in your WordPress dashboard or add REST API Support For Custom Content Types in WordPress.
This example fetches data from a WordPress site whose content types have already been configured and exposed to the REST API.
Displaying a list of WordPress posts
Section titled Displaying a list of WordPress postsThe page src/pages/index.astro lists each dinosaur, with a description and link to its own page.
Directorysrc/
Directorypages/
- index.astro
Directorydinos/
- [slug].astro
- astro.config.mjs
- package.json
Fetching via the API returns an object that includes the properties:
title.rendered- Contains the HTML rendering of the title of the post.content.rendered- Contains the HTML rendering of the content of the post.slug- Contains the slug of the post. (This provides the link to the dynamically-generated individual dinosaur pages.)
---import Layout from "../layouts/Layout.astro";
let res = await fetch("https://norian.studio/wp-json/wp/v2/dinos");let posts = await res.json();---<Layout title="Dinos!">  <section>    <h1>List of Dinosaurs</h1>    {      posts.map((post) => (        <article>          <h2>            <a href={`/dinos/${post.slug}/`} set:html={post.title.rendered} />          </h2>          <Fragment set:html={post.content.rendered} />        </article>      ))    }  </section></Layout>
Using the WordPress API to generate pages
Section titled Using the WordPress API to generate pagesThe page src/pages/dinos/[slug].astro dynamically generates a page for each dinosaur.
---import Layout from '../../layouts/Layout.astro';
const { slug } = Astro.params;
let res = await fetch(`https://norian.studio/wp-json/wp/v2/dinos?slug=${slug}`);let [post] = await res.json();
// The getStaticPaths() is required for static Astro sites.// If using SSR, you will not need this function.export async function getStaticPaths() {  let data = await fetch("https://norian.studio/wp-json/wp/v2/dinos");  let posts = await data.json();
  return posts.map((post) => ({    params: { slug: post.slug },    props: { post: post },  }));}---<Layout title={post.title.rendered}>  <article>    <h1 set:html={post.title.rendered} />    <Fragment set:html={post.content.rendered} />  </article></Layout>
Returning embedded resources
Section titled Returning embedded resourcesThe _embed query parameter instructs the server to return related (embedded) resources.
---const { slug } = Astro.params;
let res = await fetch(`https://norian.studio/wp-json/wp/v2/dinos?slug=${slug}&_embed`);let [post] = await res.json();---
The _embedded['wp:featuredmedia']['0'].media_details.sizes.medium.source_url property is returned, and can be used to display the featured image on each dinosaur page. (Replace medium with your desired image size.)
<Layout title={post.title.rendered}> <article> <img src={post._embedded['wp:featuredmedia']['0'].media_details.sizes.medium.source_url} /> <h1 set:html={post.title.rendered} /> <Fragment set:html={post.content.rendered} /> </article></Layout>Publishing your site
Section titled Publishing your siteTo deploy your site visit our deployment guides and follow the instructions for your preferred hosting provider.
Community Resources
Section titled Community Resources- Building An Astro Website With WordPress As A Headless CMS by Chris Bongers.
- Building with Astro x WordPress on Ben Holmes’s stream.
- Building a Headless WordPress Site with Astro by Jeff Everhart.
- Astro and WordPress as an API by Darko Bozhinovski.
Production Sites
Section titled Production SitesThe following sites use Astro + WordPress in production:
- Dinos! by Anindo Neel Dutta — source code on GitHub


